How to Choose a Mount for Three Monitors and a Laptop
A triple monitor with laptop mount works best with two arms for the side screens, a center mount for the main screen, and a laptop tray below or beside them. Check each screen and laptop weight against the mount limits, confirm VESA holes and tray width, and measure your desk depth before you buy.
On this page (11 sections)
- How many arms do you need for a triple monitor with laptop mount?
- What load limits should you check on each arm and tray?
- How do you size the laptop tray for your laptop?
- Which layout fits your desk size and screen sizes?
- How do you check VESA fit and mounting holes before buying?
- How much tilt, swivel and rotation do you need?
- How do you set up and align three screens plus a laptop?
- What are the trade-offs of each mount type in this guide?
- How do you manage cables, power and desk space?
- What mistakes should you avoid when buying a triple monitor with laptop mount?
- How should you decide between the mounts in this guide?
A triple monitor with laptop mount works when you split the load across enough arms instead of forcing one mount to hold everything. Use a dual arm for two matching screens, a single arm or riser for the third, and a separate tray or arm for the laptop.
Each device then stays under its own limit and can be adjusted on its own.
Three screens plus a laptop create four alignment points. Arm count, load limits and tray fit decide whether the setup stays steady or sags.
We compared dual arms, single arms, trays and risers so you can check those points before you buy.
This guide also covers desk thickness, pole height, cable routing and screen sizes. A monitor arm mount is the starting point for most setups, because the arm controls reach, tilt and swivel for each screen.
How many arms do you need for a triple monitor with laptop mount?
You need at least three screen supports plus one laptop support for a true four-device setup. A dual arm counts as two supports, so pair it with a single arm for the third screen and a tray or laptop arm for the laptop.
Do not assume a dual arm can take a third screen on its center pole. The VIVO Dual Monitor Desk Mount is built for two screens from 13 in to 30 in, at up to 22 lb each.
It has no third bracket for another monitor or a laptop tray.
That limit is normal for this class of mount. A triple monitor with laptop mount usually means a combination of mounts, not one all-in-one frame.
Count the brackets in the box, not the marketing name.
Count brackets, not product names
A product called a triple mount may mean three arms, three brackets on one pole, or two arms plus a center bracket. Check how many VESA plates are included and how many screens each plate can hold.
A laptop tray is a different bracket from a VESA plate. It needs a flat surface, side lips or a strap, and enough width for the laptop base.
A monitor bracket does not become a laptop tray just because it is nearby.
For a laptop on its own support, a best laptop arm mount style arm gives you the same tilt and swivel controls as a screen arm. It costs more space than a fixed tray, but it lets you raise the laptop screen to eye level.
Rule: count one bracket per screen and one tray or arm per laptop, then buy that many supports.
What load limits should you check on each arm and tray?
Check the limit per arm, per tray and for the whole mount, because each part carries a different share of the load. The per-arm limit matters most for the heaviest screen on the longest arm.
The VIVO dual mount allows up to 22 lb per screen. That covers many 24 in to 27 in screens, but you must look up your exact model, since screen size alone does not tell you weight.
Laptop trays often allow less than monitor arms. A thin laptop may weigh 3 lb to 4 lb, while a larger work laptop can weigh more, so check the tray limit rather than the arm limit it attaches to.
The clamp or pole also carries the total. A clamp may bend or slip under a heavy three screen load, even if each arm is within its own limit.
Leave headroom under the maximum
Buy a mount whose per-arm limit sits above your heaviest screen by a clear margin. That margin helps when you extend an arm to its full reach.
Use the stated screen size range and weight range together. A mount may accept a 30 in screen only if that screen stays under the weight limit, and a lighter 27 in screen may still exceed the limit if it is unusually heavy.
If you plan to use a best heavy duty monitor arm for the center screen, check whether its tray or bracket option also fits your laptop. Heavy duty arms often focus on large monitors and may not include a laptop platform.
Rule: weigh every screen and the laptop, then keep each one under the limit for its own arm or tray.
How do you size the laptop tray for your laptop?
Size the tray to the laptop with its lid open and its rear feet on the tray, not to its closed footprint. Width, depth and front lip height all affect fit.
A tray needs room for the base, plus space so the screen can tilt back without hitting the arm or center monitor. If it is too shallow, the laptop sits too far forward and the keyboard angle feels awkward.
Check vents and ports before you buy. A lip or strap that covers a side vent or charging port will cause daily problems, so keep the rear clear for heat.
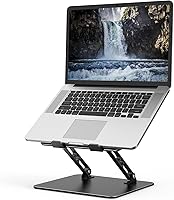
A best laptop mount for monitor arm tray attaches to an existing arm and saves a second clamp. It suits a dual arm with the laptop below the center screen.
Lower center tray versus side arm
A lower center tray puts the laptop under the main screen and keeps the keyboard centered. This works well when the center screen is high enough to clear the open laptop lid.
A side arm puts the laptop beside the third screen and frees the center. This works better on a deep desk, or when you use the laptop as a second main screen for chat, music or reference.
Measure the open laptop height. If the top of its screen reaches the bottom edge of the center monitor, you may need to raise the center screen or move the laptop to the side.
Rule: measure the open laptop, then choose a tray wide and deep enough with clear vents and ports.
Which layout fits your desk size and screen sizes?
Choose the layout from desk width, desk depth, and the three screen sizes together. A wide desk can hold three screens in a row, while a narrow desk needs the laptop below the center screen.
Three 27 in screens side by side need a very wide desk. Angling the side screens inward reduces total width, so check arm reach first.
Desk depth affects the laptop position. A shallow desk may suit a side arm or riser better than a tray in front of a clamp.
Our guide to How to Choose a Standing Desk: A Simple Guide covers depth and height range for the whole workstation.
A best dual monitor riser can lift the center screen and create space below for a laptop. Put your largest screen in the center at eye level, with the laptop where you can reach its keyboard easily.
Rule: place the center screen at eye level, then fit the laptop and side screens to the desk you actually own.
Rule: place the center screen at eye level, then fit the laptop and side screens to the desk you actually own.
How do you check VESA fit and mounting holes before buying?
Check VESA 75x75mm or 100x100mm holes on each screen before you order any arm or bracket. Most modern monitors use one of those two patterns, but older or slim models may use a different pattern or need an adapter.
The VIVO dual mount above fits 75x75mm or 100x100mm holes. Its detachable VESA plates let you attach the brackets to the screens first, then slide them onto the arms.
That step is easier with a second person holding the screen.
Measure the hole spacing with a ruler rather than trusting the screen size. A 27 in monitor can use either pattern, and the wrong screws will not hold the bracket flat.
Check the back of each screen for recessed holes. Some screens need short screws or spacers because the mounting area sits inside a curved or recessed back panel.
Keep the screws that came with the mount separate from the screws already in the screen.
Clamp, grommet or freestanding base
A C-clamp fits the back edge of a desk up to the stated thickness. The VIVO dual mount above uses a heavy duty C-clamp for desks up to 3.25 in thick, plus an optional grommet mount.
A grommet mount needs a hole through the desk. That gives a firm hold, but you cannot move it without filling the hole.
A freestanding base needs no holes, but it takes desk surface and can move if the arms are pulled far forward.
A best wall mount monitor arm removes the desk clamp question, but it needs a stud or a solid wall fixing. It also fixes the screen positions to the wall, so measure the wall height and desk position first.
Rule: confirm VESA pattern, screw fit and clamp thickness for every screen before you order.
How much tilt, swivel and rotation do you need?
You need tilt for screen angle, swivel for side screens, and rotation for portrait use. Most modern arms cover all three, but the ranges differ, so check the numbers.
The VIVO dual mount offers tilt from +90 degrees to -90 degrees, swivel of 180 degrees, and rotation of 360 degrees. Full rotation lets you turn a side screen to portrait for code, documents or chat.
Side screens need swivel to angle inward, often by 20 degrees to 40 degrees in a three screen arc. An arm that only moves forward and back cannot create that arc.
Rotation matters less if all screens stay in landscape, but it helps during setup to reach controls or ports. A best single monitor arm for the third screen should match the dual arm ranges to align all three at the same height and angle.
Height adjustment along the pole
Height adjustment along the center pole lets you raise or lower the whole set. This matters when the desk height changes, as it does with a standing desk, because the screens must stay at eye level in both positions.
Set the center screen first. Then match the side screens to its top edge, not to its center, so the three screens form one visual line.
Lock each joint after you set the angle. An arm that drifts under load will change your eye line during the day.
Rule: choose arms with tilt, swivel and rotation that match across all three screens.
How do you set up and align three screens plus a laptop?
Set up the center screen first, then the side screens, then the laptop, because the center screen sets your eye level. Work from the middle outward so each new device matches a fixed reference.
Start at your normal working height. Raise the center screen so its top edge sits at or just below eye level, and tilt it back a few degrees to face your eyes.
Add the left and right screens on the dual arm and angle them inward. Keep their top edges level with the center screen so the three form one visual line.
Add the laptop last, with its keyboard at a comfortable height and its screen clear of the center monitor. Adjust cable clips along the arms and pole so cables do not pull on the joints.
Move each arm through its full tilt and swivel range and check that cables do not tug and the clamp does not slip.
Rule: align the center screen, then match the side screens and laptop to it.
What are the trade-offs of each mount type in this guide?
Each mount type trades desk space, firmness, and cost differently. The right choice depends on your desk, your screens, and whether you plan to move the setup.
A clamp-on dual arm, like the VIVO model, gives a firm hold and leaves the desk surface clear. It needs a suitable desk edge and thickness for the clamp, and it ties the setup to that desk.
A freestanding dual arm, like the VIVO STAND-V002F, needs no clamp or grommet hole. Its base is 13 in by 10.5 in, so it uses desk space and must stay within its center of gravity.
VIVO warns not to pull monitors too far forward or back unless the stand is bolted down. A riser lifts by a fixed amount, while a wall mount frees desk space but needs correct stud placement and suits a permanent office more than a shared desk.
Rule: choose the mount type that fits your desk and your plan to move or keep the setup.
How do you manage cables, power and desk space?
Plan power and data cables before you mount the screens, because arm movement changes cable length. A cable that is tight at rest will pull when you swivel a side screen.
Route each cable along the arm and center pole with the clips provided. The VIVO dual mount includes cable management clips along the arms and center pole, and the freestanding model uses detachable clips on the arms and pole.
Run power cables to one strip near the clamp, then loop slack at each joint. Slack lets the arm move without pulling the plug or port, and a clip at the pole can group the three screen cables together.
Keep the laptop charging cable long enough to reach the tray in raised and lowered positions. A short cable may pull the tray down when you move it.
A clamp mount leaves space under the screens open for a keyboard or storage. A freestanding base takes a fixed block of that space, so measure its footprint against your keyboard depth.
Rule: route cables with slack at every joint, then check the run from your chair.
What mistakes should you avoid when buying a triple monitor with laptop mount?
The most common mistake is buying by screen count instead of bracket count, weight and VESA fit. A box that says triple may still hold only two screens and a laptop tray.
The second mistake is using screen size in place of weight. A 30 in screen can exceed a 22 lb per arm limit, while a smaller screen may be lighter.
Look up the weight of each exact model.
The third mistake is ignoring tray size. A tray that fits a 13 in laptop may be too small for a 16 in laptop, or its lip may block a vent.
Measure the laptop open, with the lid tilted back.
The fourth mistake is skipping desk measurements. A clamp for 3.25 in or less will not suit a thicker desktop, and a freestanding base needs its full 13 in by 10.5 in on the surface.
Our monitor arm mount guide covers these checks in more detail.
Rule: check bracket count, weight, VESA fit, tray size and desk measurements before you buy.
How should you decide between the mounts in this guide?
Decide by desk type first, then screen weight, then laptop position. That order removes most wrong choices in a few minutes.
If your desk has a suitable back edge and you want the surface clear, a clamp-on dual arm for the side screens plus a single arm or tray for the rest is the firmest option. The VIVO Dual Monitor Desk Mount suits two screens up to 30 in and 22 lb each, with full tilt, swivel and rotation for an angled side pair.
If you cannot clamp or drill the desk, a freestanding dual arm keeps the same two screen capacity without a desk fixing. The VIVO STAND-V002F suits two screens from 13 in to 27 in, at up to 22 lb each, on a 13 in by 10.5 in base.
Keep the screens within the base center of gravity.
Add a laptop tray on a separate arm or below the center screen, and add a single arm or riser for the third screen. That combination gives you a triple monitor with laptop mount setup without forcing one mount beyond its stated limits.
Measure every screen, the laptop and the desk before you order.
Frequently asked questions
Can one mount hold three monitors and a laptop?
One standard dual arm cannot hold three separate monitors and a laptop at once. Most setups use a dual arm for two screens, a single arm or riser for the third screen, and a laptop tray on a separate arm or below the center screen.
Check each mount's arm count, weight limit and VESA fit first.
What weight limit do I need for a triple monitor with laptop mount?
Add the weights of all screens and the laptop, then compare each item with the limit for its own arm or tray. A laptop tray often has a lower limit than a monitor arm, and the center pole or clamp must carry the total load.
Leave some headroom rather than buying a mount that is exactly at its maximum.
Where should the laptop sit in a three monitor setup?
Place the laptop below the center monitor on a tray, or to one side on its own arm, so its screen does not compete with the main display. Below the center screen saves desk space and keeps the laptop keyboard within reach.
A side position works better when your center screen is large or your desk is deep.
Do I need VESA holes for my monitors and laptop mount?
Most monitor arms need VESA 75x75mm or 100x100mm holes on the back of each screen. Your laptop does not use VESA holes, but the tray must be wide and deep enough for the laptop and allow its vents and ports to stay clear.
Measure the laptop closed and open before you order a tray.